How to Install a Dual Battery system.
Author: JRAutofix Date Posted:22 February 2023
How to Install a Dual Battery system
Installing a dual battery isolator (SBI12 specifically) can provide added security to your electrical system by ensuring that one battery is reserved solely for starting the engine while the other battery can be used for other accessories such as lights, sound systems, winch, compressor, portable fridge etc.
At the same time, it allows you to make the most of your alternator and having an extra source of power available.
Depending on your car the auxiliary battery can be installed either in the engine bay or the boot of the car. This device can also be used in 4WD, boat and commercial vehicles.
One of the most reliable isolator switch and offering many features is the Smart Redarc SBI12.
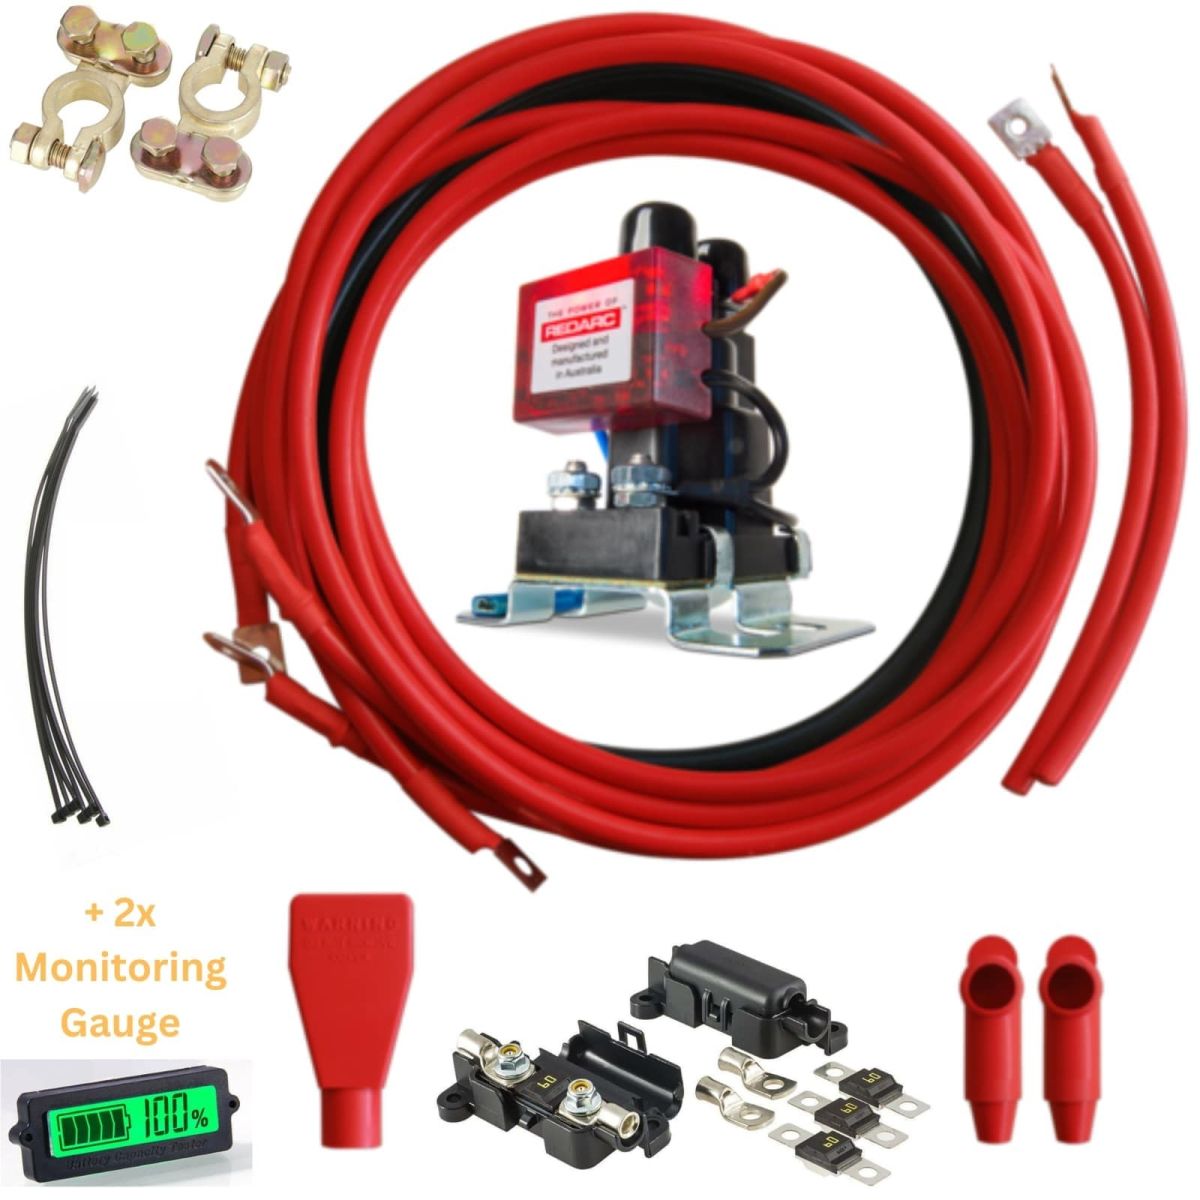
SBI12 Dual Battery Isolator Kit
Here is a step-by-step guide to install and connect a dual battery isolator (SBI12):
Step 1: Disconnect both batteries negative cable.
This will prevent any accidental electrical discharge while working on the battery.
Step 2: Bolt down the battery isolator near main battery.
Choose a location that is easily accessible, close to the main batteries and in a location where the cables will not interfere with other parts of the vehicle and away from direct engine heat.
Ideally it should be in a vertical position. Horizontally is OK too, but not upside down.
Step 3: Connect the SBI12 ground wire.
The black wire needs to be connected to the chassis. Make sure that you remove any paint or dirt to ensure a good connection.

Step 4: Connect both batteries positive cable to the battery isolator.
1. Connect one end of the positive cable to the positive terminal on the main battery and the other end to the "input" terminal on the battery isolator.
2. Connect one end of the positive cable to the positive terminal on the auxiliary battery and the other end to the "output" terminal on the battery isolator.
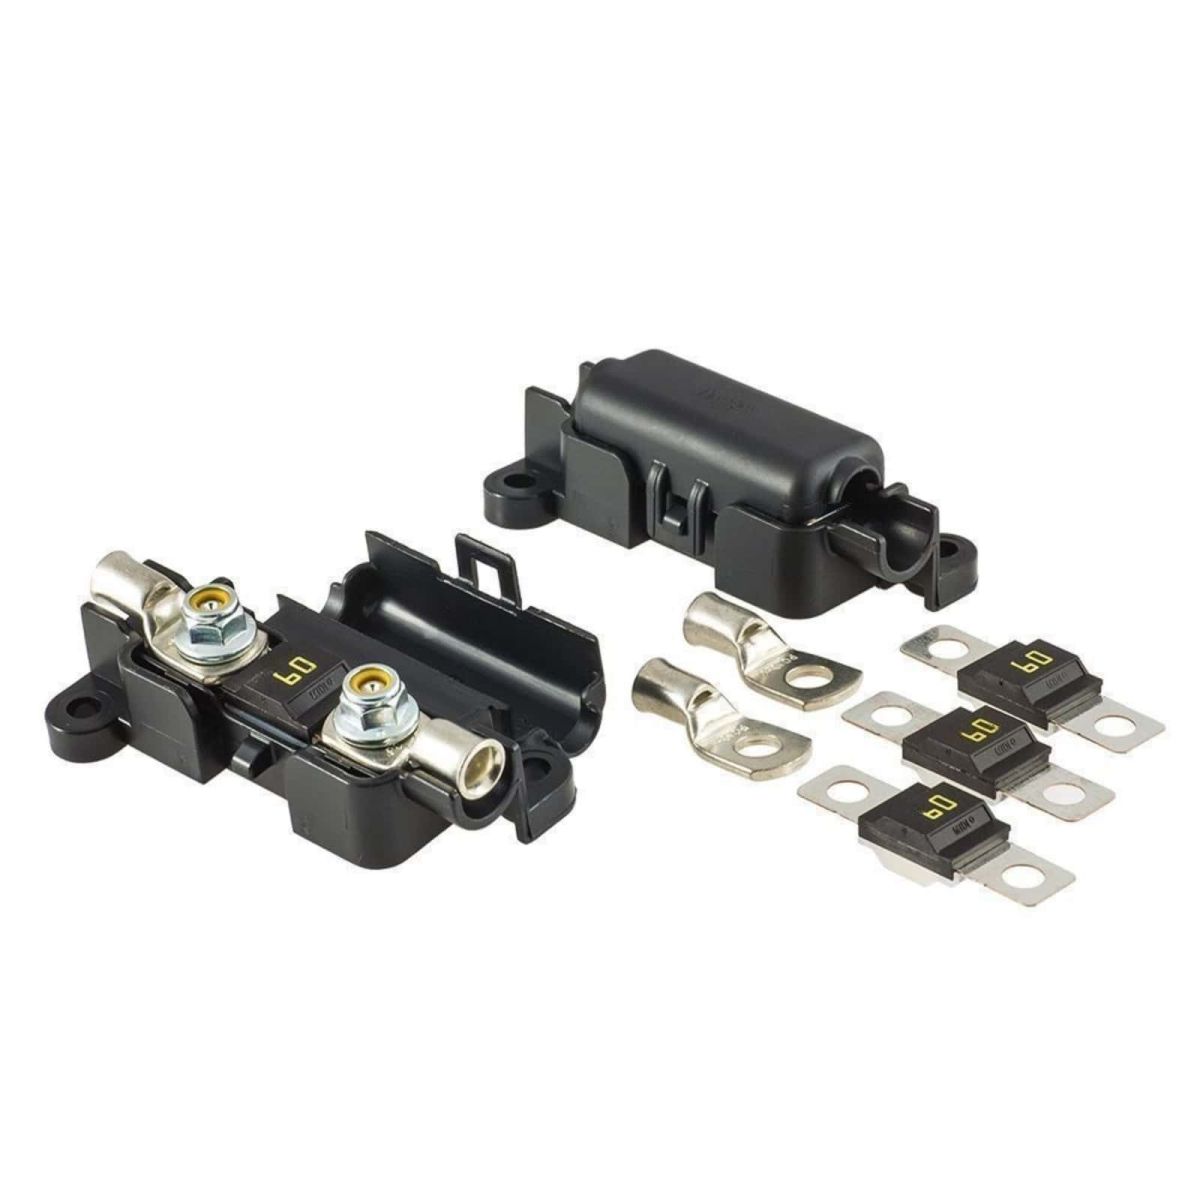
3. A circuit breaker/Fuse should be installed at battery end of both positive cables. (to protect the system from an electrical surge)
Note: Insure adequately sized cable is used. Fuse recommended are MIDI Fuse (little Fuse) with MTA fuse holder.
Step 5: Reconnect both batteries negative cable.
Reconnect securely the negative cable to the chassis. Make sure that you remove any paint or dirt to ensure a good connection.
Step 6: Test the system.
1. Turn on the vehicle and apply a charge to the start battery.
2. Check to make sure that the batteries are charging properly.
3. Once the start battery rises to 13.2 Volts the isolator switch will activate, you will hear the solenoid click and see the LED illuminate.
4.Now turn off the vehicle and when the voltage of the main battery drop off below 12.7 Volts the smart switch will disconnect the auxiliary battery and the LED will go out.
A voltmeter can be used to monitor the voltage levels of the batteries and ensure that the system is functioning properly.
A switch can also be connected to the blue wire to manually control the isolator switch.
.jpg)
Step 7: Secure the cables.
Use zip ties to secure the cables and heat shrink to cover any exposed wires and lugs.
Also use covers for the main connections.
What do you need for a dual battery isolator switch set up?
1. Redarc Dual battery isolator.
2. An auxiliary 12 volts battery type, Deep cycle or lithium-ion.
3. Battery cables: You will need positive and negative cables to connect the batteries to the battery isolator and to the ground. The cables should be of a suitable size for the current draw of the system (60A/100A).
4. Battery terminals: You will need positive and negative battery terminals to connect the cables to the batteries.
5. Fuses: You will need 2 fuses and 2 fuses holder to protect the system. The size of the fuse should be appropriate for the maximum current draw of the system.
6. Cable zip ties: You will need zip ties to secure the cables and have a neat installation.
7. Battery terminal/lug protectors.
8. Wrench set: You will need a wrench set to tighten the battery terminals.
9. Optional: A voltage meter can be used to monitor the voltage levels and capacity of the batteries and ensure that the system is functioning properly.
Note: It's important to consult the manufacturer's instructions for the specific components you are using, as the components and the installation process may vary depending on your specific setup.
How does a dual battery setup work?
The REDARC Smart SBI2 is a microprocessor-controlled dual battery isolator used in dual battery systems as a solenoid priority system. It will protect the start battery from excessive discharge, whilst allowing the auxiliary battery to supply non-essential loads. The SBI2 provides 12 volt DC incorporating up to 100A of continuous ratings.
Power Saving Technology
It incorporates electronic components that will prevent the solenoid from generating high voltage transients. It is better than a diode battery isolator due to the voltage drop associated with diode type isolation. It features a low standby current draw and sophisticated fault detection and LED indication of operation to warn the user of faults including over-voltage, voltage drop and excessive current draw conditions.
The Smart Start SBI12 dual battery isolator switch is a safe way to charge a dual battery system and should often be installed with a high quality fuse kit.
Features include:
- Overmould design
- Compact in size and easy to install
- Silver contacts for longer life and suitable for marine applications
- Power saving technology
- Fault indication
- Fully surge protected